“`
A functional head-mounted display for roughly the price of lunch sounds like the sort of promise normally followed by tiny print, mysterious shipping fees, and a product photo featuring more Photoshop than electronics. Yet the famous $25 head mounted display was a real maker-world discovery. It emerged from an inexpensive toy system, used a genuine microdisplay, accepted ordinary analog video, and gave experimenters a wonderfully affordable way to put a screen in front of one eye.
Was it high-definition? Absolutely not. Its monochrome picture had fewer pixels than a modern smartwatch icon. Still, the project demonstrated something more important than raw specifications: wearable computing did not have to remain trapped inside corporate research laboratories or extremely expensive military equipment.
This guide explores the history of the low-cost display, explains how the technology works, examines realistic DIY applications, and considers whether a similar budget build still makes sense today. Spoiler alert: it can be useful, but nobody should expect a pocket-size IMAX theater held together with electrical tape.
The Story Behind the $25 Head Mounted Display
The project gained attention in 2007 after makers discovered that a replacement headset sold for a children’s remote-controlled spy vehicle contained surprisingly useful technology. The original toy allowed its operator to drive a camera-equipped vehicle while watching the live feed through a monocular eyepiece.
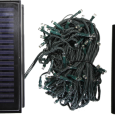
The complete system included a camera, a wireless video transmitter and receiver, and the wearable display. The replacement eyepiece was briefly available for about $20, making the total cost of adapting it to another video source roughly $25 after adding a connector and a few basic components.
A Tiny Kopin Microdisplay Inside a Toy
At the center of the headset was a Kopin 300M microdisplay. It produced a black-and-white image with a resolution of approximately 300 by 240 pixels. By current standards, that is modest enough to make a spreadsheet file a form of abstract art. In 2007, however, finding any complete wearable display at that price was remarkable.
The eyepiece was already packaged with magnifying optics and supporting electronics. Instead of designing a microscopic display driver from scratch, a builder could concentrate on feeding it a compatible composite video signal.
Why Makers Became Excited
The display represented an unusual combination of low price, hackable construction, and standard video technology. Early buyers quickly proposed projects involving portable computers, cameras, robots, night-vision experiments, retro games, and wearable information terminals.
Demand reportedly overwhelmed the supply of replacement headsets. That reaction revealed a persistent truth about the maker community: place an inexpensive screen inside an odd-looking plastic shell, and someone will immediately try to turn it into a cyborg accessory.
How a Head-Mounted Display Works
A basic head-mounted display requires four essential elements: an image source, a small display panel, an optical system, and a wearable support structure. The original budget unit packaged the microdisplay and optics together, dramatically simplifying the project.
The Display Panel
The panel converts an incoming electrical signal into a visible image. Older low-cost systems often accepted NTSC or PAL composite video, while newer displays may use HDMI, MIPI, DisplayPort, USB, or a proprietary interface.
Composite video is convenient for experimentation because many cameras, media players, converters, and single-board computers can generate it. Its disadvantage is limited image detail. Fine desktop text becomes difficult to read, and detailed interfaces often collapse into a shimmering collection of optimistic pixels.
The Magnifying Optics
A miniature screen placed only a few inches from the eye cannot normally be focused on comfortably. A magnifying lens or eyepiece creates a virtual image that appears farther away. This allows the eye to focus while making the small panel look like a larger floating screen.
Lens selection and alignment matter enormously. A display with excellent electronics can still look terrible if its lens is tilted, positioned at the wrong distance, or centered somewhere near the wearer’s eyebrow.
Important optical characteristics include:
- Field of view: How much of the wearer’s vision the image occupies.
- Eye relief: The distance between the eye and the nearest optical component.
- Exit pupil: The region where the eye must be positioned to see the full image.
- Focus distance: The apparent distance at which the virtual image is formed.
- Brightness and contrast: Whether the content remains visible under different lighting conditions.
Monocular Versus Binocular Displays
The historical $25 headset was monocular, meaning it presented an image to only one eye. This design is simpler, lighter, and cheaper than a binocular display. It is well suited to glanceable information, camera feeds, instrumentation, and simple text.
A binocular headset presents images to both eyes. It may show the same picture to each eye or create stereoscopic depth by rendering two slightly different views. Binocular systems can provide greater immersion, but they require more careful optical alignment and may need interpupillary-distance adjustment for comfortable viewing.
What You Need for a Modern DIY Version
Finding the exact toy headset for its original price is unlikely today. A modern project can still follow the same philosophy by combining salvaged electronics, an inexpensive display module, or a smartphone-based viewer.
1. A Suitable Display
The easiest option is a complete viewfinder or eyepiece assembly that already includes its lens. Possible donor devices include old camcorders, video goggles, FPV equipment, electronic viewfinders, discarded inspection tools, and obsolete wearable displays.
Before buying a loose microdisplay, confirm that documentation and a compatible controller are available. A panel without its driver board may be technically impressive but practically useful only as a very small rectangular paperweight.
2. A Compatible Video Source
An analog headset needs a composite video signal. A Raspberry Pi can be particularly useful because composite output is supported across many models, although the connector location and configuration method vary. Some boards use an RCA jack or an audiovisual connector, while others expose pads that require careful wiring.
Modern computers and phones generally output digital video, so an HDMI-to-composite converter may be necessary. The converter must generate the correct regional video format and provide a signal the display can synchronize with reliably.
3. Power and Signal Wiring
Never assume that an unfamiliar headphone-style connector follows a standard audio pinout. Similar-looking plugs can carry power, ground, and video in completely different arrangements.
Identify the required voltage, polarity, and connector contacts before applying power. A multimeter, current-limited bench supply, continuity testing, and careful notes are far cheaper than replacing a rare display after it produces the traditional puff of diagnostic smoke.
4. A Stable Head Mount
A workable mount can be adapted from safety glasses, a lightweight headset, a cap, a sports-camera strap, or a 3D-printed frame. The structure should allow adjustment in several directions so the eye can be aligned with the optical sweet spot.
Weight distribution matters as much as total weight. A small module mounted far in front of the face can create more neck strain than a heavier module positioned close to the head. Batteries and processing hardware should usually be moved to a pocket, belt, or rear counterweight rather than stacked beside the eye.
Best Uses for a Low-Resolution Head-Mounted Display
A budget monocular display should not be treated as a replacement for a desktop monitor. Its strengths are portability, simplicity, and the ability to show a small amount of information without occupying both hands.
Robot and Remote-Camera Viewing
The design is naturally suited to displaying video from a small robot, inspection camera, or remotely operated vehicle. The original product did exactly that. A builder can use a wired connection, an analog wireless receiver, or a digital system converted to the display’s input.
This setup is best used while seated or standing in a safe area. Walking around with one eye occupied by a remote camera is a highly efficient method of discovering furniture that was previously considered harmless.
Simple Telemetry and Sensor Data
Large numbers, status indicators, compass headings, temperatures, battery levels, and short alerts work well on a low-resolution screen. A compact computer can generate a high-contrast dashboard with only the most important information.
The best interface resembles an aircraft instrument more than a web page. Use thick lines, bold symbols, limited menus, and large type. Tiny icons, pale gray text, and decorative animations should be politely escorted out of the project.
Retro Gaming and Video Experiments
Composite video makes the display compatible with older game systems, media players, and vintage computers. The monochrome picture can add an appealing science-fiction appearance to classic games, even when the original graphics were colorful.
Fast action may expose blur, poor contrast, or signal noise, but slower games and terminal-based adventures can be surprisingly entertaining. It is less “next-generation virtual reality” and more “secret government computer from a 1984 movie,” which is arguably a feature.
Wearable Terminal Projects
A small Linux computer can display command-line information, system logs, messages, or navigation prompts. Because the available resolution is limited, a custom full-screen application usually works better than mirroring a conventional desktop.
A practical terminal might show six to ten lines of large text, accept input from a compact keyboard, and use simple keyboard shortcuts instead of complicated window controls.
Can You Really Build One for $25 Today?
The honest answer is: sometimes, but not reliably. The original price depended on a replacement part being sold below the value of its components. Once makers discovered it, inventory disappeared quickly.
A genuine sub-$25 build is most realistic when the builder already owns the video source, wiring tools, battery, and mounting materials. Salvage stores, surplus electronics, broken camcorders, and online auctions may provide a suitable eyepiece, but availability varies widely.
A smartphone Cardboard-style viewer is another inexpensive path. It uses a phone as both the screen and computer, with two lenses creating a binocular virtual-reality display. Google’s Cardboard design remains open for experimentation and can be constructed from simple materials. However, it is not equivalent to the original monocular composite-video headset.
The better goal is not to force every component beneath an arbitrary price ceiling. It is to preserve the original project’s spirit: reuse available hardware, understand the signal path, and create a useful wearable display without buying an expensive commercial headset.
Limitations You Should Expect
Low Resolution
A 300-by-240-pixel image is suitable for basic video and oversized text. It is not suitable for modern productivity software, dense web pages, detailed maps, or applications requiring precise visual judgment.
Narrow Field of View
Many inexpensive eyepieces resemble a small television floating in the distance rather than a panoramic virtual world. This can be beneficial for glanceable data, but disappointing for users expecting immersive VR.
Brightness and Ambient Light
An enclosed eyepiece may provide strong contrast indoors but block part of the wearer’s real-world view. A see-through optical design preserves environmental awareness, although it is harder to build and may struggle outdoors unless the display is sufficiently bright.
Comfort and Eye Fatigue
Poor alignment, excessive brightness, unstable mounting, flicker, and an uncomfortable focus distance can cause fatigue. Binocular mismatches add further challenges, but even a monocular display can become unpleasant if it is used continuously.
Safety Guidelines for DIY Head-Mounted Displays
Wearable displays can reduce situational awareness and may cause dizziness, headache, eye strain, fatigue, nausea, or disorientation. Stop using the display when symptoms appear rather than attempting to “push through” them. Your inner ear is not impressed by determination.
- Test the display while seated in a clear, stable area.
- Begin with short sessions and take regular breaks.
- Do not use the headset while driving, cycling, climbing, or operating machinery.
- Route cables so they cannot catch on furniture or pull the headset suddenly.
- Avoid exposed conductors and secure batteries in protective enclosures.
- Reduce brightness to a comfortable level instead of using the maximum setting.
- Remove the headset immediately if vision becomes blurred or balance feels impaired.
A homemade device has not necessarily undergone the optical, electrical, mechanical, or biocompatibility testing applied to a commercial product. Treat it as an experimental instrument, not safety equipment or a medical device.
Related Experience: What Building and Using One Feels Like
A representative low-cost head-mounted-display project usually begins with excitement and a small object that refuses to identify any of its wires. The display looks simple from the outside: eyepiece, cable, plastic housing. Then the connector presents four nearly identical contacts, and the project immediately becomes an electronics investigation.
The first useful step is documentation. A builder searches for model numbers, photographs of disassembled units, archived manuals, and circuit-board markings. When documentation is missing, continuity testing and cautious voltage measurements become essential. This stage is slower than the dramatic soldering montage imagined at the beginning, but it prevents the project from ending as a lesson about reverse-polarity protection.
Once power is confirmed, the first picture often appears badly. It may roll vertically, lose synchronization, display heavy static, or show a dark image with barely visible shapes. The cause can be an incorrect PAL or NTSC setting, a weak ground connection, a converter that produces an unusual signal, or a video source attempting to output an unsupported mode.
When the signal finally locks, the result is strangely satisfying. A menu appears inside the eyepiece, enormous and grainy, floating in a black visual tunnel. Even a simple camera feed creates the unmistakable feeling of wearable technology. The picture is not beautiful, but the fact that it exists at all feels like a minor act of engineering sorcery.
The next challenge is mechanical rather than electronic. Holding the eyepiece by hand makes the image look acceptable, yet attaching it to glasses often shifts the lens a few millimeters and causes half the picture to disappear. The mount must allow horizontal, vertical, angular, and distance adjustment. Slots, small hinges, sliding brackets, and reusable fasteners are more valuable than a rigid enclosure during early testing.
After several revisions, the display becomes usable while seated. Large white text on a black background is clear enough to read. Small desktop labels are not. A custom interface with oversized characters transforms the experience because it works with the hardware instead of demanding that the hardware imitate a modern monitor.
Watching a remote camera is one of the most convincing demonstrations. A small vehicle can move through another room while the wearer sees its viewpoint. Minor latency is noticeable, and judging distance through a single low-resolution image takes practice, but the connection between head-mounted screen and remote machine feels immediate.
Long sessions reveal the compromises. Pressure develops where the frame touches the nose or temple. A front-heavy mount slowly drifts downward. The viewing eye may feel tired, while the uncovered eye remains focused on the room. These problems encourage another round of improvements: lighter brackets, softer padding, a rear strap, lower brightness, and shorter usage periods.
The lasting value of the experience is not the finished headset alone. The project teaches analog video, connector identification, power management, lens positioning, human factors, mechanical design, and interface simplification. Every limitation becomes a design lesson. Resolution teaches typography. Narrow field of view teaches information prioritization. Poor balance teaches weight distribution. Unlabeled wires teach humility.
That is why the $25 head mounted display remains memorable. It was never merely a cheap screen. It was an invitation to examine an ordinary toy, recognize the sophisticated components hiding inside it, and imagine a completely different purpose for them.
Conclusion
The original $25 head mounted display was a perfect maker discovery: inexpensive, unusual, technically approachable, and full of possibilities. Its 300-by-240 monochrome microdisplay could not compete with modern VR hardware, but it lowered the cost of experimenting with wearable video at a time when commercial headsets remained expensive and uncommon.
Reproducing the exact project for the exact historical price may be difficult today. Nevertheless, its design principles remain useful. Salvaged viewfinders, composite-capable single-board computers, inexpensive display modules, and smartphone viewers all offer paths into DIY wearable computing.
The smartest modern version is not necessarily the one with the widest field of view or the largest list of features. It is the one designed around a clear purpose, a readable interface, safe usage, comfortable mounting, and components the builder can actually understand. Sometimes the future does not arrive in a polished retail box. Sometimes it arrives inside a toy spy car wearing a suspiciously affordable eyepiece.
