Silver is a little dramatic. Leave it alone for a while, and it starts sulking under a gray, brown, or nearly black film. The good news is that tarnished silver is not ruined silver. In most cases, it just needs the right cleaning method, a gentle touch, and a little patience. Whether you are dealing with sterling silver jewelry, family flatware, a serving tray that has been hiding in a cabinet since the Obama administration, or silver-plated decor that has lost its sparkle, you can usually bring it back without turning your kitchen into a chemistry lab gone rogue.
This guide walks you through how to polish silver, how to remove silver tarnish safely, and how to keep silver from getting dingy again five minutes after you finish admiring it. We will cover easy everyday cleaning, deeper tarnish-removal methods, mistakes to avoid, and practical care tips for silver jewelry, silverware, and heirloom pieces. In other words: shine first, panic never.
What Causes Silver Tarnish?
Silver tarnish is a surface reaction, not a sign that the metal is “going bad.” Over time, silver reacts with sulfur-containing compounds in the air and environment, creating a dark layer on the surface. Humidity, salty air, perspiration, cosmetics, certain papers, rubber, and chlorine exposure can all speed up the process. That is why silver jewelry can tarnish while sitting in a box, and why a serving spoon can come out of storage looking like it has seen things.
Here is the silver lining: because tarnish lives on the surface, it can often be removed. The trick is choosing a method that matches the item. A plain sterling silver bracelet is not the same as a silver-plated antique teapot. And a gemstone ring definitely does not want the same treatment as a fork. Silver is classy, but it is also picky.
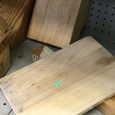
Before You Start: Figure Out What You Are Cleaning
Before you reach for baking soda, polish, or a miracle cleaner your aunt swears by, identify the piece.
Sterling Silver
Sterling silver is real silver alloyed with other metals for strength. It responds well to careful polishing and routine maintenance. Many jewelry pieces, flatware sets, and decorative objects are sterling.
Silver-Plated Items
Silver plate has a thin layer of silver over another base metal. It can look beautiful, but it is less forgiving. Aggressive scrubbing and abrasive cleaners can wear through the plating over time, so gentleness matters.
Antique, Oxidized, or Decorative Silver
Some silver is intentionally darkened in crevices to highlight a pattern. Some antique pieces also have a desirable patina that collectors prefer. If you remove every bit of darkness, you can remove some of the charm too. For valuable heirlooms, museum-quality pieces, or anything that makes you nervous just looking at it, professional cleaning may be the smarter move.
Silver with Gemstones, Pearls, or Glued Elements
This is where caution becomes your best friend. Porous stones like pearls, opals, and turquoise do not love harsh chemicals, abrasive pastes, or soaking methods. If the piece includes delicate gems, enamel, adhesive, or oxidized detailing, skip aggressive tarnish-removal shortcuts and use a soft polishing cloth or jewelry-specific cleaner approved for that material.
Method 1: Clean Lightly Dull Silver With Soap and Water
If your silver looks more tired than truly tarnished, start simple. Warm water, a few drops of mild dish soap, and a soft cloth can remove skin oils, dust, and light film without much risk.
What You Need
- Warm water
- Mild dish soap
- A soft microfiber or lint-free cloth
- A soft toothbrush for small crevices
How to Do It
- Mix a few drops of dish soap into warm water.
- Dampen a soft cloth in the solution and gently wipe the silver.
- Use a very soft toothbrush for detailed areas if needed.
- Rinse with clean water.
- Dry immediately with a clean, soft cloth.
This method is ideal for routine silver care and for jewelry that is not heavily tarnished. It is also the best first step before moving to stronger polishing methods. Think of it as the silver equivalent of washing your face before using fancy skincare.
Method 2: Use a Baking Soda Paste for Moderate Tarnish
When silver has visible tarnish but does not need the full “science fair volcano” treatment, a baking soda paste can work well. It gives you more control than a soaking method, which is especially helpful on pieces with curves, handles, or carved details.
How to Make the Paste
Mix baking soda with a small amount of water until it forms a thick but spreadable paste. You want something closer to yogurt than soup. If it runs, it is too thin. If it sits there like a brick, add another drop of water.
How to Apply It
- Wet the silver slightly or dampen your cloth.
- Apply the paste with a soft lint-free cloth.
- Rub gently, especially over tarnished areas.
- Work the paste into crevices with care.
- Rinse thoroughly.
- Buff dry with a clean microfiber cloth.
This method is great for silverware, simple jewelry, and many household silver items. The key word, however, is gently. Baking soda is milder than many harsh abrasives, but it still has grit. If you scrub like you are trying to erase a bad memory, you can dull the finish or damage delicate patterns.
Method 3: Remove Tarnish With the Aluminum Foil Bath
This is the internet-famous method that actually has a real chemical basis behind it. Instead of polishing the tarnish off mechanically, the foil-and-baking-soda bath helps reverse the tarnish reaction. It is especially popular for silver flatware and plain silver-plated items.
What You Need
- A bowl, pan, or heat-safe container
- Aluminum foil
- Hot or boiling water
- Baking soda
- Salt
How to Do It
- Line the container with aluminum foil.
- Place the silver so it touches the foil.
- Add hot water.
- Stir in baking soda and a little salt.
- Let the silver sit for several minutes.
- Remove, rinse, and dry thoroughly.
When it works, it feels almost suspiciously easy. Tarnish fades, silver brightens, and you start wondering whether your spoon has been secretly taking self-improvement classes.
When This Method Is a Bad Idea
Do not use this approach on everything in sight. Avoid it for pieces with pearls, opals, turquoise, glued stones, heavily oxidized silver, or highly valuable antiques. It can strip away desirable dark detailing and may not be appropriate for fragile or collectible items. In short, this is a strong method, not a universal one.
Method 4: Use a Commercial Silver Polish for Better Control
If you want the safest middle ground between “mild soap” and “kitchen chemistry,” a quality non-abrasive silver polish is often the best choice. Commercial silver creams, foams, liquids, and polishing cloths are designed to remove tarnish while minimizing scratching. They are especially useful for heirlooms, ornate silver, and pieces that need a more refined finish.
How to Use Silver Polish
- Apply a small amount of polish to a soft cloth or sponge.
- Rub gently in straight lines or small circles, depending on the product instructions.
- Focus on tarnished areas without overworking the whole piece.
- Rinse if the product requires it.
- Dry and buff immediately.
Silver polishing cloths are excellent for regular maintenance and quick touch-ups. They are particularly handy for jewelry and serving pieces that are only lightly tarnished. A cloth will not rescue a severely blackened tray overnight, but it can keep everyday silver looking sharp with very little fuss.
How to Polish Different Types of Silver
Silver Jewelry
For chains, rings, bangles, and earrings, start with soap and water. Move to a polishing cloth or jewelry-safe silver cleaner if tarnish remains. Use extra caution with stones. If the jewelry has pearls, opals, turquoise, or antiqued detailing, gentle hand-cleaning is usually the wiser route.
Silver Flatware
Flatware responds well to paste polishing or the foil bath, depending on the level of tarnish. Dry each piece completely to prevent water spots. For everyday silverware, frequent use and proper drying can actually reduce the need for heavy polishing.
Silver-Plated Trays, Bowls, and Decor
Choose a gentle silver polish or a careful hand method. Avoid aggressive scrubbing, rough sponges, and repeated abrasive treatments. Plating is thin, and once it wears through, there is no magic cloth on Earth that will politely put it back.
Antique Silver
Less is often more. Many antique pieces benefit from preserving some patina, especially in decorative recesses. If the item is valuable, sentimental, or unusually old, consult an experienced jeweler, silversmith, or antique conservator before you do anything dramatic.
What Not to Use on Silver
Silver does not need “creative” cleaning. It needs the right cleaning. Some popular shortcuts can do more harm than good.
- Toothpaste: often too abrasive for silver and can scratch the surface.
- Paper towels: rougher than they seem and may leave micro-scratches.
- Stiff brushes or scouring pads: a fast way to dull the finish.
- Bleach and chlorine-based cleaners: bad news for silver.
- Over-polishing: especially risky for silver plate and detailed patterns.
- Random dips on delicate jewelry: convenient, yes; universally safe, no.
Also avoid leaving silver wet after cleaning. Air-drying sounds harmless, but it often creates water spots and defeats part of the point of polishing in the first place.
How to Keep Silver From Tarnishing Again
Once your silver is shiny, your job is only half done. The other half is keeping it that way for longer than a weekend.
Dry It Completely
Moisture encourages tarnish and spotting. After washing or polishing, dry silver immediately and thoroughly with a soft cloth.
Store It Properly
Use anti-tarnish cloth, flannel pouches, or lined storage boxes. Keep pieces in a dry place with limited air exposure. Sealable storage bags designed for silver can also help.
Keep It Away From Trouble
Do not store silver with rubber bands, newspapers, felt of unknown composition, or anything damp. Avoid exposure to chlorine, bleach, salty air, and heavily humid environments whenever possible.
Use It
Oddly enough, silver often does better when it is used regularly than when it is forgotten in a drawer for a decade. Gentle handling and routine cleaning can keep buildup from becoming a full-on tarnish crisis.
When You Should Call a Professional
Some pieces deserve expert care. Consider professional help if your silver is:
- An antique or collectible item
- Heavily damaged, pitted, or scratched
- Set with fragile or porous gemstones
- Intentionally oxidized or decorated with dark patina
- So valuable that you would lose sleep if something went wrong
A professional jeweler or conservator can help clean the piece without stripping character, damaging stones, or wearing away the surface. Sometimes the smartest DIY project is knowing when not to DIY.
Final Thoughts on Polishing Silver
Learning how to polish silver is less about brute force and more about choosing the right method for the right piece. For light dullness, mild soap and water may be enough. For moderate tarnish, a baking soda paste can do the trick. For plain silverware and sturdy household items, the aluminum foil method can feel like a minor miracle. And for treasured heirlooms, non-abrasive silver polish often gives the best balance of shine and control.
The biggest mistake people make is treating all silver the same. Sterling silver, silver plate, antique silver, and gemstone-set jewelry each have different needs. Respect those differences, go easy on abrasives, dry pieces thoroughly, and store them well. Do that, and your silver can stay bright enough to make you feel like the kind of person who casually owns polished candlesticks. Which, after this article, you absolutely are.
Real-Life Experiences With Silver Tarnish and Polishing
Anyone who has ever opened a jewelry box and found a favorite silver chain looking weirdly moody already understands the emotional side of silver care. Tarnish is not just a cleaning problem; it is a tiny betrayal. One day your bracelet is bright and reflective, and the next day it looks like it has been living in a pirate chest at the bottom of the ocean.
A very common experience happens with family silverware. It stays packed away for holidays, anniversaries, or “special dinners,” which means it spends most of the year sitting still in storage. Then Thanksgiving rolls around, someone opens the box, and every fork looks like it just came back from a Victorian ghost story. This is usually when people learn a valuable lesson: silver does not appreciate being ignored. The more rarely it is handled, the more dramatic the tarnish reveal tends to be.
Jewelry creates a different kind of frustration. A sterling silver ring worn often may stay reasonably bright, while the matching earrings tucked away in a drawer darken faster. That mismatch confuses a lot of people until they realize that silver tarnishes differently depending on air exposure, body oils, humidity, cosmetics, and storage conditions. Translation: your jewelry is not inconsistent; it is just responding to its environment like a tiny shiny weather station.
Many people also discover that the first cleaning method they try is not always the best one. Someone might grab a paper towel and scrub too hard, only to realize the piece looks cleaner but less glossy. Others try a DIY hack that works beautifully on plain flatware but turns out to be too aggressive for decorative jewelry. That trial-and-error process is part of why silver care has such a strong “learn as you go” reputation. The item itself usually tells you when you have found the right method: the shine returns, the details stay crisp, and the whole piece looks refreshed rather than overworked.
There is also a surprising amount of satisfaction involved. Polishing silver is one of those chores that actually rewards you while you are doing it. You wipe one section, and there it is: instant contrast. The dark film lifts, the reflection comes back, and you suddenly become very committed to cleaning the entire piece because now you need closure. It is one of the rare household tasks with a built-in before-and-after moment every few seconds.
For people caring for inherited silver, the experience can be even more personal. A tray from a grandmother, a baby cup from a christening, or a bracelet passed down through generations often feels less like an object and more like a memory with fingerprints. Cleaning those pieces can be deeply satisfying, but also slightly nerve-racking. That is why so many people prefer gentle methods first. When a sentimental item brightens up without losing its character, it feels like you have done more than clean metal. You have helped preserve a story.
And then there is the maintenance revelation. After one major silver-cleaning session, most people become believers in prevention. Suddenly anti-tarnish bags look less like overkill and more like wisdom. Drying a spoon right away no longer seems fussy. A polishing cloth in the drawer becomes a tiny insurance policy against future regret. In other words, experience teaches what articles can only suggest: silver care is much easier when you stay ahead of the tarnish instead of waiting until your favorite piece looks like a prop from a period drama.


